When you build a new home, it is easy to get swept up in countertops, paint colors, and light fixtures. But the systems you never see once the walls are closed up are the ones that determine whether your home runs smoothly for the next thirty years. Planning ahead for drainage, water, waste, and structural details before construction finishes saves you from expensive retrofits later. This guide walks through the hidden and semi-hidden systems worth thinking through now, while decisions are still cheap to make.
Grading and Drainage Before the Foundation Goes In
Water is the single biggest threat to a new home, and most of that risk is decided before the foundation is even poured. Proper grading directs rain away from the house instead of letting it pool against the walls or seep into the basement. A good builder will set the slope of your lot early, but it is worth asking specific questions about where water will travel during a heavy storm.
If your property has low spots or heavy clay soil, this is also the time to think about long-term maintenance needs. Buried drain lines and gutter downspout extensions can clog with silt and debris over the years, and eventually you may need drain cleaning services to keep water moving the way it was designed to. Planning cleanout access points now, while trenches are already open, is far cheaper than digging them up later.
Water Lines and Landscape Planning
Landscaping often gets treated as an afterthought, planned only after the house is finished. But irrigation lines, valves, and control wiring should be mapped out before sod or hardscaping goes down, especially if you want zoned watering for lawn areas versus garden beds. A typical setup includes separate zones for turf, planting beds, and drip lines for trees or shrubs, each requiring its own valve and wiring run back to a central controller. This is also the time to plan sleeving under any future driveways, walkways, or patios. Running a few extra PVC sleeves under hardscape areas while it’s still just dirt costs almost nothing, but boring under a finished paver patio later can run several hundred dollars and risks cracking the surface above. Running irrigation lines at the same time as other underground utilities, like electrical conduit for landscape lighting or low-voltage lines for a future water feature, avoids trenching through a finished yard later. Coordinating trenching schedules with your excavator means one pass through the yard instead of three, which saves both money and the hassle of resodding the same strip of lawn repeatedly. It’s also worth having your irrigation layout reviewed alongside the final grading plan, so sprinkler heads don’t end up fighting against drainage swales or low spots where water already pools.
Think about water pressure and timing needs for different plant zones, since a newly seeded lawn requires far more frequent watering than established shrubs or trees. Most irrigation designs break the yard into separate zones based on plant type and sun exposure, so a front lawn zone might run three to four times a week while a drip zone for mature shrubs only needs a weekly soak. Getting this zoning right at the planning stage means fewer dead patches and less wasted water once everything is established. A smart controller tied into your irrigation system can adjust automatically based on weather, skipping cycles after rain or during cooler stretches when evaporation slows down. This saves water and reduces the chance of overwatering near the foundation, which over time can soften soil and contribute to settling or cracks. Many of these controllers also let you monitor flow remotely, so a cracked line or stuck valve gets flagged before it turns into a soggy yard or a spike in your water bill. Mapping this out early also makes it easier to add drip lines for flower beds without disrupting walkways or patios down the road. It’s worth sleeving extra irrigation pipe beneath any planned hardscaping, even areas you don’t intend to plant right away, since trenching through finished concrete or pavers later is far more expensive than running an empty conduit during the initial build. Taking the time to sketch out mature plant sizes and root spread can also help you avoid placing lines where future roots might crush or puncture them.
Roof Structure and Material Decisions
The roof is one of the few systems that is both highly visible and deeply structural, which makes the decisions around it more complicated than they first appear. Before you settle on shingles, metal, or tile, talk through ventilation, decking thickness, and underlayment with whoever is managing that part of the build. Many homeowners interview several roofing companies during the planning phase specifically to compare warranty terms and installation methods, since those details vary more than most people expect.
Climate matters enormously here. A steep pitch sheds snow well but may not suit a hot, sunny region where reflective material keeps attic temperatures down. Ask about ridge vents, ice and water shield in valleys, and how the chosen material performs over a 20 to 30 year span, since this is not a system you want to revisit sooner than necessary.
Choosing a Roofing Partner for the Long Term

Separate from material selection is the question of who actually installs and later services your roof. A new build is the ideal time to establish a relationship with a roofing contractor you trust, since that same contractor will likely be the one you call for inspections or storm damage years down the line. Ask about certifications, manufacturer-backed warranties, and whether they inspect attic ventilation as part of a standard visit.
It also helps to ask how roofers handle unexpected issues discovered mid-project, since decking rot or framing problems sometimes only become visible once old materials are removed. A trustworthy contractor will document those finds with photos and walk you through cost implications before proceeding. Getting this process clear upfront, even on a brand new roof, sets expectations for future maintenance calls.
Septic System Sizing and Access Planning
If your new build is not connected to municipal sewer service, your septic system deserves serious early planning. Tank size needs to match household size and water usage, and the drain field location has to account for soil type, slope, and distance from wells or water lines. Getting this sized correctly from the start prevents backups and premature system failure.
Just as important is planning for long-term access. Builders sometimes bury septic lids under landscaping or hardscape, which makes a routine septic pump out far more difficult and costly than it needs to be. Ask your builder to mark riser locations clearly and keep that area free of permanent structures or heavy plantings, so future maintenance crews can reach the tank without tearing anything up.
Protecting Trees and Soil With Organic Groundcover

New construction sites tend to strip topsoil and compact soil with heavy equipment, which can leave trees and planting beds struggling for years afterward. One practical solution some homeowners use is bringing in Bark Blowers to apply a thick, even layer of mulch across disturbed areas once grading is finished. This method distributes material more evenly than hand spreading and covers large areas quickly, which matters on a new build where the whole lot may need coverage at once.
Mulch does more than look tidy. It regulates soil temperature, slows moisture evaporation, and gradually breaks down to add organic matter back into compacted soil. For homeowners dealing with heavy clay left behind by construction equipment, this step can meaningfully speed up how fast a yard recovers and becomes plantable.
Exterior Cladding and Moisture Barriers
Siding is often chosen for color and texture, but its real job is managing moisture before it ever reaches your framing. Behind every type of siding should be a weather-resistant barrier, properly lapped flashing, and ventilation gaps that let any trapped moisture escape. Getting this detail wrong is one of the most common causes of hidden rot in new homes.
Experienced siding contractors will walk you through drainage plane options and explain how their installation method handles window and door transitions, which are the most vulnerable points for leaks. Ask to see examples of their flashing work on a past project if possible, since photos from mid-installation reveal far more than a finished exterior ever will. This is also a good time to discuss rainscreen systems if you are building in a particularly wet climate.
Outdoor Living Spaces That Age Well
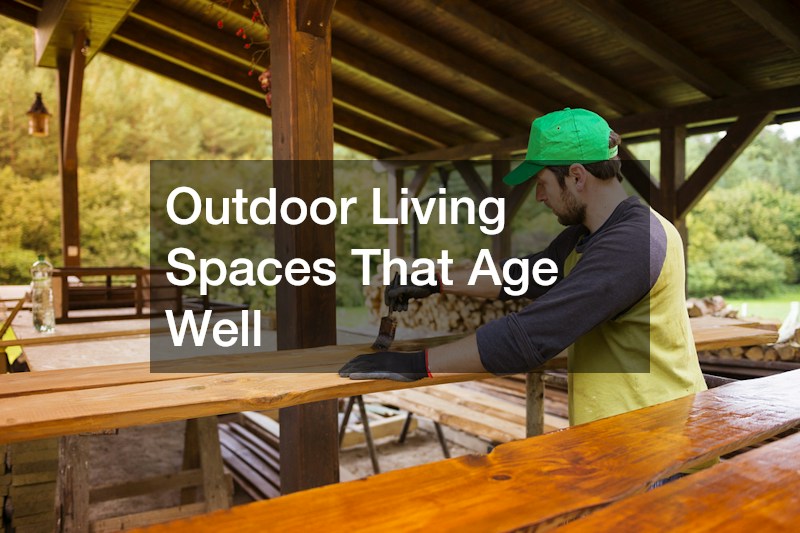
Decks and patios are technically exterior additions, but they involve plenty of hidden structural work, including footings, ledger board attachment, and flashing where the structure meets the house. Footings need to be sized and set below the frost line for your region, which can mean digging 36 to 48 inches deep in colder climates—a detail that’s far easier to coordinate while excavation equipment is already on site. Planning a custom deck build during the initial construction phase lets you tie structural posts into the foundation plan and run electrical conduit for outdoor lighting, speaker wire, or a future hot tub circuit before siding and landscaping are finished. It also gives you the chance to size the ledger board attachment correctly and install flashing that integrates with the house wrap, rather than cutting into finished siding after the fact. This is also the time to think about what the space will carry long-term: a pergola, an outdoor kitchen, or a fire feature all add dead load and may require additional footings or beefed-up framing. Sleeving in conduit or gas lines now, even if you don’t install the fixtures right away, avoids trenching through a finished patio later. Retrofitting these details later almost always costs more and looks less seamless. Beyond the added expense, retrofits often involve patching siding, matching weathered materials, and working around existing grading or drainage that was never designed with a deck in mind.
Material choice affects long-term maintenance significantly, so think beyond the initial look. Composite decking resists rot and insects and typically carries a 25 to 50-year warranty, but it costs roughly two to three times more upfront than pressure-treated lumber. Pressure-treated lumber is cheaper initially, typically $15 to $25 per square foot installed, but needs resealing every 1 to 3 years and regular inspection for cracking, warping, and insect damage. Whichever you choose, make sure ledger board flashing is installed correctly, since this detail is responsible for a large share of deck failures and water intrusion into the home. The ledger board, which attaches the deck to the house, needs proper flashing that directs water away from the band joist and sheathing behind it rather than letting moisture wick into the framing. Look for Z-flashing or a flashing-and-membrane combination installed beneath the siding, not just caulked on top of it, since caulk alone degrades within a few years and masks rather than prevents leaks. It’s also worth having your contractor use stainless steel or hot-dipped galvanized fasteners rated for ground contact, since standard hardware can corrode quickly when exposed to treated lumber chemicals or coastal air. Spacing joists at 12 inches on center instead of the standard 16 inches adds rigidity and reduces long-term sagging, especially under hot tubs, outdoor kitchens, or heavy furniture. These choices cost relatively little during construction but are expensive and disruptive to fix once the deck is built and the house is occupied.
Shade and Energy Management for Outdoor Areas
As energy costs climb, more homeowners are planning for passive cooling strategies from the start rather than adding them after move-in. Covered patios, deep roof overhangs, and strategically placed outdoor solar shades can all reduce how much direct sun hits windows and exterior walls during peak summer hours. Building these elements into your plans now means conduit and mounting points can be placed before stucco or siding goes up, avoiding unsightly retrofits later.
- South and west-facing windows typically benefit most from exterior shading
- Motorized shade systems can be wired during construction for a cleaner finished look
- Retractable designs allow sun exposure in cooler months and shade during summer
- Proper shade placement can measurably lower cooling costs in hot climates
- Durable, UV-resistant fabrics hold up better against long-term sun exposure
Building a new home gives you a rare chance to plan the systems that quietly keep your house running, rather than reacting to problems after the drywall is finished. Taking time now to think through drainage, roofing, septic access, siding details, and outdoor structures will pay off in fewer surprises and lower repair bills for years to come. Walk through each of these systems with your builder before construction locks them in place, and you will move into a home built to handle whatever comes next.